
And fixed the frame on the front door position with 4 M5*8 self-tapping screws. 2, Use 16 M8*12 inner hex round screws and M8 flange nut for fixing the top & bottom panels into two side frames. 4, Insert back panel. Follow the instructions in this section to remove and install the side panels. Insert the key that comes with the rack cabinet into the key hole on the side panel, and turn it clockwise to unlock. If an IT cabinet is not equipped with side panels and placed in the end position, side panels need to be installed to ensure that the outer side of an end cabinet has side panels. Mark the mounting hole positions for the end cabinet based on the mounting holes in the cabinet side panel, and install. Complete Assembly Procesure for 9U Wall Mounted Network Cabinet (Single Section) How to assemble a wall-mounted network cabinet? 1, Insert top and bottom panel into the side frames. more How to assemble a wall-mounted. Installing and setting up a network cabinet system correctly is essential for maintaining an efficient and organized network infrastructure. In this comprehensive guide, we will walk you through the step-by-step process to ensure a successful installation and setup of your network cabinet system. Page 3 M3. 5 Attach Back Panel (H) to the rear of the cabinet frame,using M3. Click Side Panels (E) into place. To install the Tempered Glass Door (G), locate the side with two pins. Insert the fixed pin into door hinge hole. Pre – installation.
[PDF]

See this topic to learn how to remove and install a door. Unlock and open the door. Removing a door Hold the door in place, and lift both hinge pins until they lock in the open position so that the door is disengaged. Remove the door from the rack cabinet frame. Install. Before installing your server in a rack cabinet, review the following guidelines: Two or more people are required to install the device in a rack cabinet. Ensure that the room air temperature is below 35°C (95°F). Do not block any air vents; usually 15 cm (6 in. ) of space provides proper airflow. In this comprehensive guide, we will walk you through the step-by-step process to ensure a successful installation and setup of your network cabinet system. Key steps include measuring the installation area, mounting rails, organizing cables, and testing stability. Proper grounding and compliance with safety. Page 3 M3. Click Side Panels (E) into place. To install the Tempered Glass Door (G), locate the side with two pins. With your thumb, pull down on the spring pin and slide it. Complete Assembly Procedure for 9U Wall Mounted Network Cabinet (Double Section) How to assemble a double section wall mounted network cabinet server rack? 1, Insert top and bottom panels into the side frames. And fixed the frame on the front door position with 4 M5*8 self-tapping screws.
[PDF]

Install clip or retainer nuts in the rack rail locations shown in the following figure. These nuts will secure the 10-32 screws that mount the rack kit's shelf and the device to the rack. For rails with round holes, use clip nuts. Whether you're setting up a home network, small business, or AV closet, this guide walks you through the full installation process — mounting, equipment placement, cable management, and power setup. •. Determine how the device can be oriented in the rack so that the nonport side has access to intake air (cool). Threaded Rack Rail Clip nuts are a long-needed alternative to the traditional and time-consuming cage nuts. I've seen and used both methods, but am still not sure which is best. Is there a recommended way of inserting them? If so, why is it the best way? From my own experience, the horizontal way (on the left) seems. Learn why IT Pros trust StarTech. com for performance connectivity accessories. In this guide, we'll see the tools you'll need, the best and proven practices for server rack setup and network rack setup, and the detailed steps you'll need to follow to achieve an efficient and future-proof infrastructure. A standard rack server is usually used to house and organize different.
[PDF]

This guide covers the critical steps, from selecting the right electrical cable tray and performing accurate cable fill calculations to managing a safe cable pull through and ensuring all bonding and grounding requirements are met. Article Summary: A compliant cable tray installation requires a thorough understanding of NEC Article 392, proper structural support, and precise installation techniques. But before you lay the first tray or clamp down a single cable, you need a solid plan. This guide breaks down the process step by step. This method statement describes a detailed procedure for properly installing cable trays and conduits for the Feeder System. It ensures that all installation activities follow authorized plans, specifications, and standards. The objective is to ensure safety, quality and compliance during the. Cable tray systems provide a safe, organized, and flexible method for supporting insulated conductors and cables in commercial and industrial electrical installations. Here is a step-by-step guide on how to install a standard metal cable tray system (e., ladder or perforated type). Before starting, ensure you have. en completely installed, without damage either to conductors or structural system use maintain spacing or to keep cables in place when the tray is ect the minimum bend ra-dius for cables as they exit the bottom of the cable tray. A rung spacing of 6 to 9 inches (150 to 230 mm) is preferable when.
[PDF]
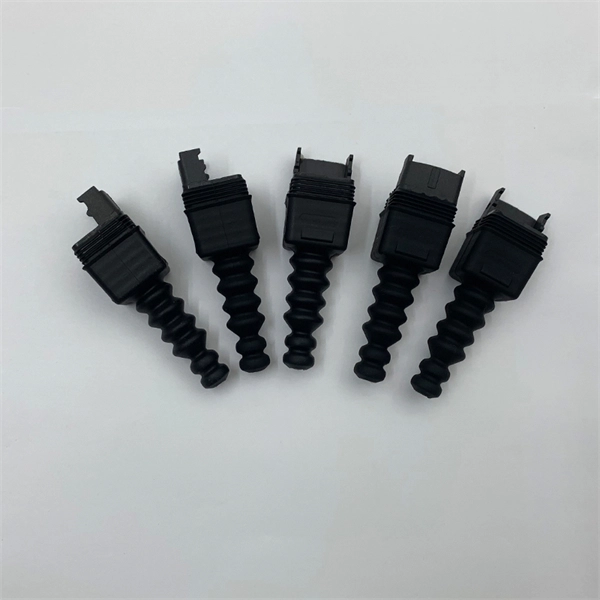
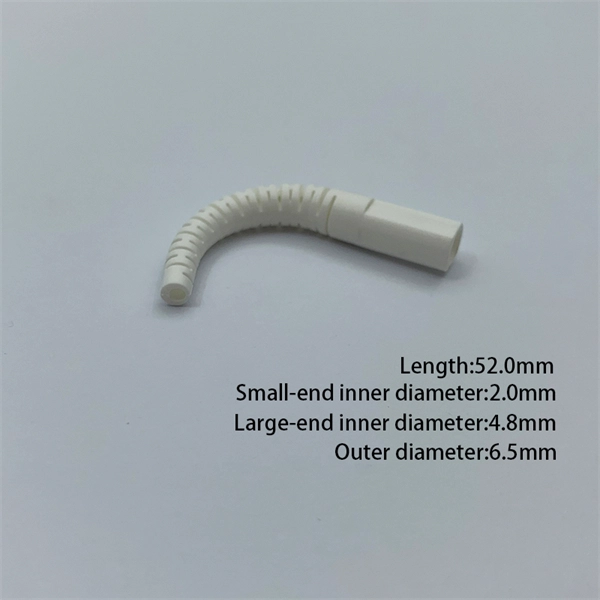
Many engineers don't know how to install this accessory. With the latest design, it can be confusing. So here is the instruction: 1. Determine the right height and the quantity of mounting bracket needed 2. Fix it on the gland. Distribution box installation How we make electrical enclosure more Easier DIY tool at home This DIY Woodworking Tool Changes Everything. If provided, proper installation of an equipment grounding terminal must be made and the rack must be grounded in accordance with NFPA 70, NEC, and the applicable sections of ANSI C2, “National Electrical Safety Code. " The equipment shall be installed by trained service personnel. All parts such as. Embarking on a Unistrut installation project can be both exciting and daunting. Whether you're venturing into medical support systems, ceiling grids, roof walks, or catwalks, ensuring a seamless installation requires careful planning and execution. In this guide, we'll delve into some expert tips. Whether you are an electrical contractor or a construction brigade, knowing how to properly and safely install distribution boxes is the basis of ensuring the safe operation of the entire system. This article details the process of installing them, which helps you comprehend distribution boxes. Before you buy electrical boxes, you want to be certain they have the right mounting holes for the devices you plan to install. Also be sure the boxes have correctly placed.
[PDF]
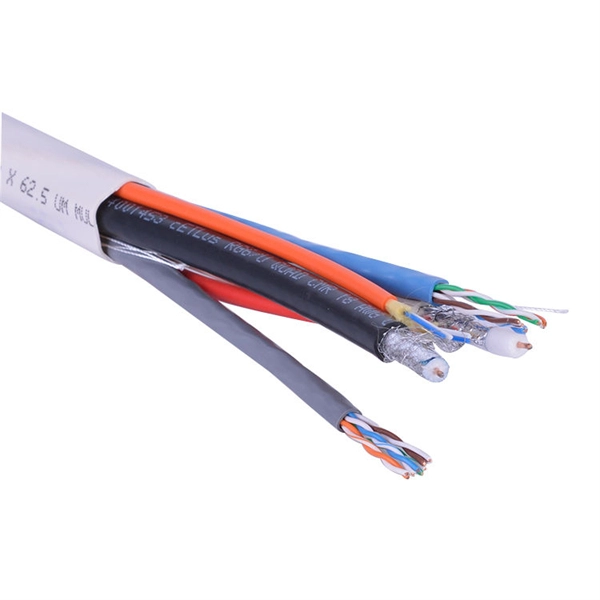
This guide summarizes field-proven rules for AI/AO/DI/DO wiring, shows how to choose between NO/NC contacts under the fail-safe principle, and explains how to decode typical cable schedule entries. Instrument installation with the associated cable installation/electrical signal and control wiring should be carried out by skilled personnel who are acquainted with the safety requirements and regulations for the plant site for that specific project. Generally instrument cabling is usually run in. Few factors are to be considered or taken care of while wiring a field instrument to control panel. Based on noise susceptibility limits (NSL) according to IEEE 815 standard, various field instrument signals are classified as below. Noise Susceptibility Limit Grounding of the signal cable Type of cable Cable Terminations Based on noise susceptibility limits (NSL). Note how the hoop-shaped “jumper” wires are all cut to (nearly) the same length, and how each of the wire labels is oriented such that the printing is easy to read: This next photograph shows a great way to terminate multi-conductor signal cable to terminal blocks. Each of the pairs was twisted. A well-designed and properly installed instrument junction box is crucial for the efficient operation and maintenance of electrical systems. Level 1: High to medium susceptibility Level 2: Low susceptibility.
[PDF]

Set your fiber optic-to-Ethernet converter box in a location near your Ethernet switch and plug in its power adapter. Insert the end of your fiber optic network line into the fiber optic connector on the converter box. Fiber optic cabling is increasingly used to connect network switches and other datacom equipment, especially in long-distance and mission-critical applications. Fiber provides: Increased internet signal bandwidth. Most modern fiber-enabled network switches require an SFP transceiver module. This is a cost-effective and high performance way to connect network switches. Advantages Determine the length of the fiber run and choose either multi mode for runs under 1000 feet or single mode for runs over 1000 feet. SFP transceiver modules are specific to the type of fiber being connected. Connecting a switch to a fiber optic network involves several steps and requires specific equipment to ensure a successful and efficient connection. This guide will. In this article, we'll explain how to connect multiple Ethernet switches using fiber optic cables and the equipment required for this to work. Network topology refers to the way in which the links and nodes of a network are arranged in relation to each other. Ethernet ports are designed for copper cables (like Cat5e or Cat6), which transmit data using electrical signals. You need a media converter or a.
[PDF]

Find and discover manufacturers & suppliers in Albania, featuring details on their shipment activities, trade volumes, trading partners, and more. View all buyers in Albania. PORTABLE LABEL MAKER: Compact and lightweight for portability, making it easy to label just about anything, anywhere PRINTS CUSTOM LABELS: Choose from 5 font sizes, 7 print styles and 8 box styles PREVIEW TEXT EFFECTS: See font effects on screen. Subscribe to global trade data intelligence to discover new business opportunities, gain market intelligence, and outpace. SELMANI sh. It operates in the civil construction industry offering the service of Hot Dip Galvanizing and customized steel structures as. KEAD is a market leader in Albania, specializing in a wide range of tools and equipment designed to. ExportHub is a leading Albanian product sourcing and suppliers directory connecting Albanian manufacturers, suppliers, traders and wholesalers with worldwide buyers from the international market. Register now!. Find local businesses, view maps and get driving directions in Google Maps.
[PDF]
Basic 300mm galvanized steel perforated trays can be found in the range of $1. 00 per meter, especially in bulk. Understanding the cable tray installation cost per meter is essential for effective budget planning. Costs vary based on tray material (steel, aluminum, or fiberglass), size, design (ladder or solid bottom), and installation complexity. Additional elements like supports, connectors, and brackets. Cable tray pricing depends on materials, coatings, size, supplier margins, and order quantity —plus hidden costs like shipping and installation. This guide breaks down everything buyers need to know, from price trends to cost-saving tips. The average cable tray price per meter ranges from $2 to. The majority of individuals will consider the cost of the components. But the actual price is the cash outlay to the workers to assemble the parts. Cable trays will tend to be significantly less expensive to use in 2026 than metal pipes due to their faster installation. 2 Why is Conduit So. Prices vary based on the size and load rating of the tray. For example: A standard 100mm wide GRP cable tray might cost around $15 per meter. Manufacturer and Brand Reputable brands often charge. The price for a 300mm width cable tray depends heavily on its type and material. We offer complete kits to provide you with cable tray ready to install under new or existing raised floors based on the unique requirements at your facility.
[PDF]

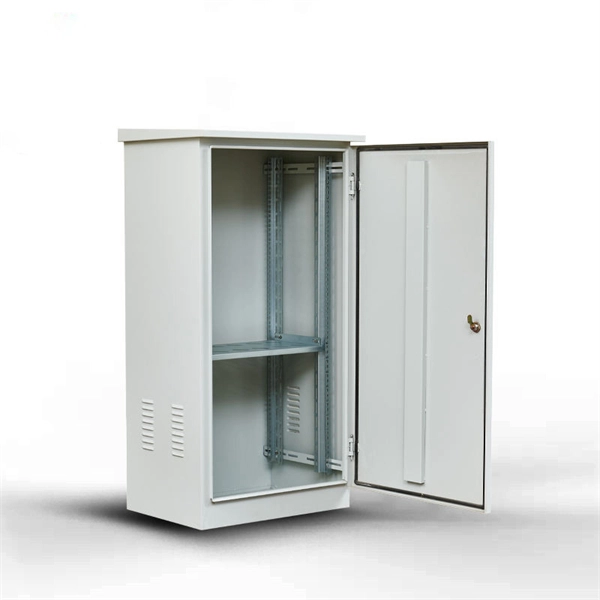
Cratus Technologies, a Brillanz Group Company, proudly inaugurated Pakistan's largest Smart Theft-Resistant Telecom Cabinet manufacturing facility in Humak, Islamabad, spanning an area of 100,000 sq. This state-of-the-art 100,000 sq., the facility aims to enhance the country's telecom infrastructure by increasing domestic manufacturing. We're innovators in the 19” racks & cabinets industry, manufacturing and supplying IT infrastructure solutions throughout U. Today, Bolein is established as a global force and a one-stop shop for IT infrastructure solutions. We're industry leaders yet still. MEK Network Cabinets protect electrical components from harsh environm. Getting in touch with us is easy. So if you have a query, a doubt or an opinion to share, there are three easy ways to contact us. Pick up the phone and call us. You can also email to us for a prompt reply or write to us at. Pakistan Network Cabinet Suppliers Directory provides list of Pakistan Network Cabinet Suppliers & Exporters who wanted to export network cabinet from Pakistan. Don't know your target market? Wanted to market your Network Cabinet products globally? Join TradeFord. com to list your products online.
[PDF]

Connect the phase and neutral wires from the input power supply to the input of the Main MCB. Learn how to install a distribution box safely and correctly. Covers wiring, placement, standards, and expert tips for a compliant setup. It takes the incoming power and safely distributes it to different circuits throughout your building. Learn how to wire a distribution box step by step! This video shows real on-site footage of electrical installation, demonstrating safe and standardized wiring methods used by professionals. Below is a quick checklist of everything you will need for a safe and efficient installation: Connecting a distribution box involves several steps to ensure proper electrical flow. It is usually equipped with circuit breakers, fuses, terminal connectors, and other components. It is mainly used to isolate fault circuits, prevent overload, and ensure the safe operation of. Box installation: Make sure that Distribution box has been correctly installed and fixed. Location determination:. An electrical panel box, also known as a breaker box or a distribution board, is a crucial component of any electrical system. It serves as a central hub for distributing electricity throughout a building, ensuring that power is delivered safely and efficiently to all the required locations.
[PDF]
This guide covers the critical steps, from selecting the right electrical cable tray and performing accurate cable fill calculations to managing a safe cable pull through and ensuring all bonding and grounding requirements are met. Article Summary: A compliant cable tray installation requires a thorough understanding of NEC Article 392, proper structural support, and precise installation techniques. Structural building members should never be cut, and cable trays should not be installed in hoist ways or where subject to physical damage. Cable tray systems re to be installed so that they are accessible. Here is a step-by-step guide on how to install a standard metal cable tray system (e., ladder or perforated type). But before you lay the first tray or clamp down a single cable, you need a solid plan. When ofloading tray from a flat deck trailer using an overhead crane, care should be exercised in the placement and length of the slings to prevent crushing the product (siderails). Only ofload. Cable tray systems are designed for easy installation and to accommodate power, communications, and signal cabling across a variety of applications. When properly installed, cable trays prevent damage to cabling and the area's structural integrity. When installed and engineered properly, cable.
[PDF]

This video shows real on-site footage of electrical installation, demonstrating safe and standardized wiring methods used by professionals. Let's break it down into two main parts: the outer shell and the electrical parts inside. The enclosure protects the electrical components from water, dust, and damage. When choosing one, check the IP or NEMA rating. A. The ideal location to install electrical distribution boxes should keep a distance from water, flammable and explosive substances and corrosive substances. If they need to be placed outdoors, especially in high humidity, you must ensure their waterproofness. Below is a quick checklist of everything you will need for a safe and efficient installation: Connecting a distribution box involves several steps to ensure proper electrical flow. Follow this guide. Box installation: Make sure that Distribution box has been correctly installed and fixed. Material preparation: Prepare the required circuit breakers, wires, wiring ties and other materials, and ensure that they meet the design drawings and installation requirements. Location determination:. Understanding the wiring diagram of an electrical panel box is essential for electricians and homeowners alike, as it allows them to troubleshoot any electrical issues, carry out repairs, or make additions to the system. The electrical panel box wiring diagram provides a visual representation of.
[PDF]