This guide walks through a complete KVM installation on Ubuntu 24. 04 LTS, from verifying hardware support to creating your first VM. Every command and output shown here was captured on a real system. KVM (Kernel-based Virtual Machine) is a virtualization technology integrated into the Linux kernel. It allows you to run multiple virtual machines (VMs) on a single physical host. Ubuntu, a popular Linux distribution, provides an excellent platform for setting up and managing KVM virtualization. If you're looking for RHEL-family coverage, see the KVM installation guide for Rocky. Whether you're running the stable Ubuntu 20. 04 Noble Numbat, or experimenting with Ubuntu 25. 04, these steps will walk you through a full KVM setup — from system checks to launching your first VM with virt-manager GUI. KVM (Kernel-based Virtual Machine) is a popular virtualization. KVM can mean two things: a KVM switch, which lets you control multiple computers with one keyboard, monitor, and mouse, or Kernel-based Virtual Machine, a Linux feature that turns your system into a hypervisor for running virtual machines. 04 is essential for both development and production environments.
[PDF]

With it, you can easily switch between different devices without having to plug and unplug cables every time. Control multiple computers with one keyboard, mouse, and monitor using our recommended KVM switches, with setup guides, troubleshooting tips, and security considerations for work and home office environments. Last Updated: October 1, 2025 KVM switches let you control multiple computers with one. 11-in-1 Docking Station: Effortlessly switch between two computers with HDMI, USB, Ethernet, and more, creating a versatile and efficient workspace. LAN for Laptop: Ensure stable and fast wired network for both laptops, no matter which laptop you switch to. 100W Power Delivery: When connected to a. 【Dual Computer Control with One Setup】Control 2 computers using one set of monitors, keyboard, and mouse. Ideal for multitasking professionals, programmers, and hybrid work setups. DisplayPort, which is typically used to replace DVI and VGA as internal connections, is supported by the switch. This technology is particularly useful for individuals who work with multiple systems simultaneously, such as. A KVM switch can revolutionize your PC setup. Here's what you need to know If you ever wished you could use one keyboard and mouse with multiple devices, here's your answer. I don't know about you, but working on multiple devices at once makes me feel like some kind of 90s hacker. I'm programming.
[PDF]
USB keyboards, mice, and I/O devices are the most common devices connected to a KVM switch. The classes of KVM switches discussed below are based on different types of core technologies, which vary in how the KVM switch handles USB I/O devices—including keyboards, mice, touchscreen displays, etc. (USB-HID = USB ) USB Hub Based KVM Also called an Enumerated KVM switch or USB switch selector, a connected/sh.
[PDF]

The process involves a combination of national infrastructure, local engineering, and property-level setup. In this guide, we'll break down the fiber installation process from start to. This guide walks you through the complete fiber installation process, from checking availability to optimizing your Wi-Fi network performance. Fiber transmits data using light signals through glass strands, delivering faster speeds and lower latency than cable or DSL connections that rely on. In this article we'll break down how fiber internet is installed - from the network fiber drop outside your house to the in-home setup with your router and gateway - and what you should expect at each stage. Fiber optic internet is generally installed in the following 5 steps, which we'll dive. Want lightning-fast internet at home? Fiber optic installation is the way to go! It's super reliable and perfect for streaming, gaming, or using multiple devices. This guide breaks down the process in easy steps so you know what to expect. BCS Consultants, a trusted fiber optic installation company based in California, provides end-to-end fiber optic services, including expert planning. However, setting up a fiber optic connection to your router can seem daunting if you're unfamiliar with the process. In this guide, we'll walk you through how to connect a fiber optic cable to a router safely and efficiently. Why Use Fiber Optic Internet? Before diving into the setup, let's quickly.
[PDF]
The first step to finding the right KVM switch is taking inventory of what you'll use it with: specifically, the number of computers, monitors, and additional peripherals, such as a keyboard and mouse. Yo.
[PDF]

We are pleased to present you our KVM Extender and Switching Systems, which are developed and produced in Europe, more precisely in Austria. Our sales partners and we are always at your disposal. SYLEX specializes in high-quality optical interconnect solutions for the telecommunications and datacom markets, offering a range of products including MTP® harnesses and PRIZM® assemblies. With strong engineering. Matrox KVM extenders allow you to centralize systems in a secure server room, and control them from a distance without compromising performance. Matrox KVM extenders can extend signals—such as keyboard, mouse, audio, video, RS232, and USB—over fiber, copper, LAN, or private WAN. The CE980 is a USB DisplayPort/HDMI Optical KVM Extender that extends KVM signals over fiber-optic transmission up to 300. Kinan's KVM extender essentially allows users to remotely control a device or computer. The unit comes with a receiver that shows the display of the device and a transmitter that sends the display signal from the sourced computer. This eliminates the space requirements for large equipment, allowing. For computers with dual video heads, extend signals over single-mode fiber. Single Mode & Multi Mode (Three Fiber) Fiber KVM Extenders.
[PDF]

This order establishes the program, planning, and implementation guidelines for upgrading communication systems that support the National Airspace System (NAS) at major airports. Our mission is to be your innovative development partner providing cost effective solutions for subsea use. We are a small team backed by decades of experience, combining different skills, backgrounds, and expertise: From sales, through engineering, manufacturing, testing and service, we. For over two decades, we have delivered tailored fiber optic solutions to Norway's most demanding projects. NFO Engineering specialize in offshore and maritime fiber optics, as well as complex infrastructure solutions for tunnels, data centers, and node construction. Through our expertise we ensure. IHSE's high performance KVM extenders and matrix switches bring new levels of functionality and capability to air traffic and airport operations. When we were established in 2001, we were among the first companies in Norway to specialize in fiber optics. Communication systems are herein defined to include discrete control/monitor, digital data, voice/voice frequency, and. N0r5ke Fibre is a Norwegian digital infrastructure company, founded by Norwegian entrepreneurs Anders and Bjørn Vik. As a neutral and independent company we lease.
[PDF]

This guide covers the critical steps, from selecting the right electrical cable tray and performing accurate cable fill calculations to managing a safe cable pull through and ensuring all bonding and grounding requirements are met. Article Summary: A compliant cable tray installation requires a thorough understanding of NEC Article 392, proper structural support, and precise installation techniques. But before you lay the first tray or clamp down a single cable, you need a solid plan. This guide breaks down the process step by step. This method statement describes a detailed procedure for properly installing cable trays and conduits for the Feeder System. It ensures that all installation activities follow authorized plans, specifications, and standards. The objective is to ensure safety, quality and compliance during the. Cable tray systems provide a safe, organized, and flexible method for supporting insulated conductors and cables in commercial and industrial electrical installations. Here is a step-by-step guide on how to install a standard metal cable tray system (e., ladder or perforated type). Before starting, ensure you have. en completely installed, without damage either to conductors or structural system use maintain spacing or to keep cables in place when the tray is ect the minimum bend ra-dius for cables as they exit the bottom of the cable tray. A rung spacing of 6 to 9 inches (150 to 230 mm) is preferable when.
[PDF]

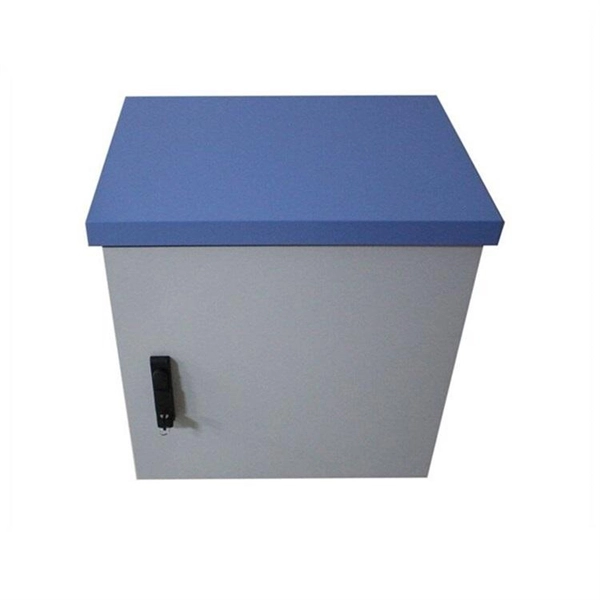
This video shows real on-site footage of electrical installation, demonstrating safe and standardized wiring methods used by professionals. Let's break it down into two main parts: the outer shell and the electrical parts inside. The enclosure protects the electrical components from water, dust, and damage. When choosing one, check the IP or NEMA rating. A. The ideal location to install electrical distribution boxes should keep a distance from water, flammable and explosive substances and corrosive substances. If they need to be placed outdoors, especially in high humidity, you must ensure their waterproofness. Below is a quick checklist of everything you will need for a safe and efficient installation: Connecting a distribution box involves several steps to ensure proper electrical flow. Follow this guide. Box installation: Make sure that Distribution box has been correctly installed and fixed. Material preparation: Prepare the required circuit breakers, wires, wiring ties and other materials, and ensure that they meet the design drawings and installation requirements. Location determination:. Understanding the wiring diagram of an electrical panel box is essential for electricians and homeowners alike, as it allows them to troubleshoot any electrical issues, carry out repairs, or make additions to the system. The electrical panel box wiring diagram provides a visual representation of.
[PDF]

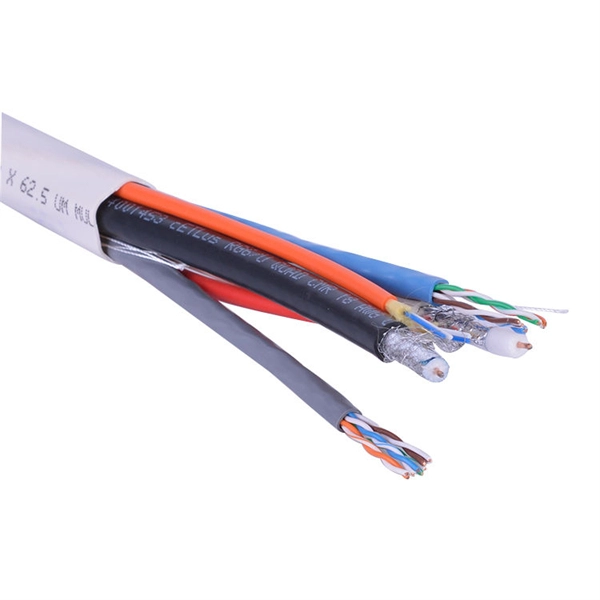
Fiber optic cable suspension clamp installation manual made by Jera line. Developed to provide a quick access to attach the fiber optic cable to the pole, using the suspension clamp HC-8-15, stainless steel band, buckles and strapping tool MBT-004. more. This guide will explain the entire set of activities involved in installing Fiber optic cable contractors -from the early planning stage right through testing-for facility managers, IT teams, and low-voltage contractors to build high-performance networks safely and efficiently. The processes. You simply can't handle and install fiber optic cable using the same methods that are used for copper. The relative fragility of fiber when compared to copper cable requires special care, special practices, and attention to detail during handling and installation. (FOA) was founded in 1995 to help develop the workforce to build the fiber optic networks to support a rapid expansion in communications and the Internet. The charter of the FOA was to promote professionalism in fiber optics through education, certification, and. The FIBERLIGN Suspension uses a combination of structural reinforcing rods (SRR), outer rods, housing halves, and resilient inserts to reduce compression, clamping, and bending stresses on OPGW and the optical fibers within it. SRR and outer rods cannot be reused. Different environments demand different fiber optic cable installation methods: aerial cables strung on poles.
[PDF]

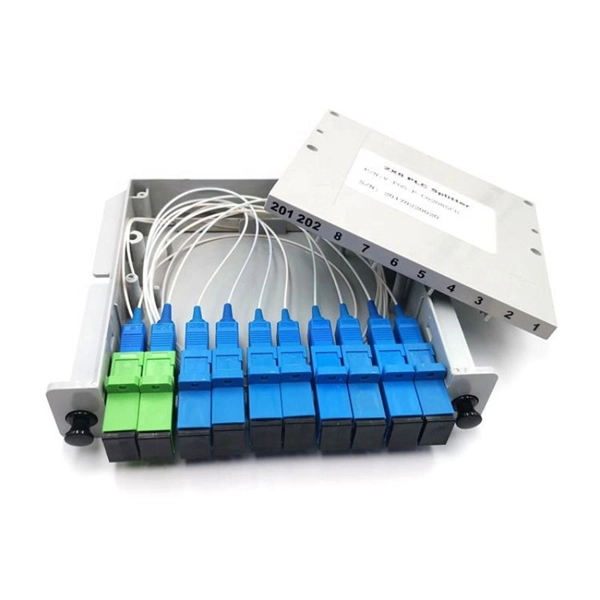
Learn how to install fiber splice trays inside an enclosure step by step. Quick, easy, and essential for fiber pigtail management! https://bit. Unlike fiber connectors, which can be plugged and unplugged, splicing creates a fixed connection that is typically more stable and has lower insertion. This document describes the installation of optical fiber with both single fiber and/or ribbon fiber splices into Optical Splice Enclosure (OSE) metal splice trays (Figure 1). Make sure you read and understand this instruction as well as instructions provided with related assemblies before. By following these detailed steps, the installation of your Fiber Splice Closure will be secure, organized, and maintained, ensuring high performance and longevity of your fiber optic network. Installing a fiber optic splice closure efficiently and effectively requires attention to detail and. How to install the splitter distribution box is the important information we need to know. This article includes the following: 1. Install the fixture 2. Box installation and fixed splitter distribution box 4. Install. Page 5 B (# 7 & 8) enter splice tray # 2. Route the fibers entering the splice tray up to splice point as shown. NOTE : Protection tube from side A enters splice tray from the far end as shown After splicing, close the splice tray and lock the front cover properly with the main and side lock.
[PDF]
This guide will walk you through every step of the process, from selecting the right materials to securing connections and ensuring safety. Whether you're a seasoned professional or an enthusiastic DIYer, our detailed instructions will equip you with the knowledge and confidence to tackle this. Learn how to properly install an electrical box safely and efficiently. In this step-by-step tutorial, we'll cover: ✅ Tools you need. Covers wiring, placement, standards, and expert tips for a compliant setup. A distribution box is the heart of any electrical system. It takes the incoming power and safely distributes it to different circuits throughout your building. A neutral bar kit is a fundamental component within an electrical service panel, often called a breaker box, designed to manage the flow of electricity in a home or building. This metal strip serves as the termination point for all neutral conductors from the branch circuits. By consolidating these. Before starting the installation, finding a proper place for putting the distribution box is crucial, because it largely decides the safety and convenience of maintenance. Let's see what factors need to be taken care of when choosing the installation place. Beginning of dialog window. Escape will cancel and close the window.
[PDF]
Many engineers don't know how to install this accessory. With the latest design, it can be confusing. So here is the instruction: 1. Determine the right height and the quantity of mounting bracket needed 2. Fix it on the gland. Distribution box installation How we make electrical enclosure more Easier DIY tool at home This DIY Woodworking Tool Changes Everything. If provided, proper installation of an equipment grounding terminal must be made and the rack must be grounded in accordance with NFPA 70, NEC, and the applicable sections of ANSI C2, “National Electrical Safety Code. " The equipment shall be installed by trained service personnel. All parts such as. Embarking on a Unistrut installation project can be both exciting and daunting. Whether you're venturing into medical support systems, ceiling grids, roof walks, or catwalks, ensuring a seamless installation requires careful planning and execution. In this guide, we'll delve into some expert tips. Whether you are an electrical contractor or a construction brigade, knowing how to properly and safely install distribution boxes is the basis of ensuring the safe operation of the entire system. This article details the process of installing them, which helps you comprehend distribution boxes. Before you buy electrical boxes, you want to be certain they have the right mounting holes for the devices you plan to install. Also be sure the boxes have correctly placed.
[PDF]